This week is our third week (after a few I've taken off from writing!) of Fall Lessons For Young Children and we are learning about pumpkins! I love pumpkins! We love decorating with them and we love eating foods that are flavored with them. I'm sharing several fun ideas covering all things pumpkin and we picked a few that worked for us this week. Which means lots of fun ideas to choose from for next year!
Pumpkin lesson ideas:
- Visit a pumpkin patch.
- Borrow books from the library to read about pumpkins.
- Roast pumpkin seeds.
- Eat a yummy pumpkin treat like my Pumpkin Muffins.
- Make a pumpkin craft...or make several! I've got a few pinned over on Pinterest!
- Discuss how pumpkins grow and different ways to use pumpkins.
Supplies you'll need:
- One paper plate per child
- Orange crayons
- Green construction paper
- Leftover toilet paper rolls (I used one cut into three pieces.)
- Green pipe cleaners (I used one cut into three pieces.)
- Craft glue
- Scissors
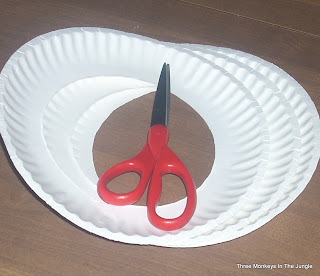
1. Preparations. I did all the scissor work before the kids were up from nap so I had the supplies all ready to go. Cut the centers out from the paper plates. Trace a simple leaf shape onto the construction paper and cut out (I bent ours in half to give them some texture). Twirl the pipe cleaner around a pencil to form the pumpkin vine then cut the pipe cleaner into two or three smaller pieces. Cut pumpkin stems out of the toilet paper rolls by cutting vertically down the toilet paper roll to make it into a rectangle. Then cut the rectangle in half length wise. Cut stem-sized pieces out of the strips of toilet paper roll.
2. Supplies. Gather together all the necessary supplies so when little ones are ready to do their craft you can jump right in and help them without having to go grab things. They do seem to have short attention spans!
 |
| Gathered supplies. |
3. Color. Have the kids color their paper plates orange. I happened to have three small broken pieces of orange crayons (actually most of our crayons are in small, broken pieces) so each child got their own.
4. Design. Set the pumpkin stem, leave, and vine pieces out and let the child decide how it should appear on their pumpkin.
6. Dry. Allow pumpkins to sit until the glue is dry to ensure that the stem, vine, and leaf remain secured to the pumpkin. I didn't take a picture of this.
7. Take More Pictures!
 |
| Sean |
 |
| Logan |
 |
| Ella |
After we were done with our little modeling the pumpkin crafts, I hung them up on our school bulletin board.
What is your favorite fall pumpkin activity?
♥Shari
Linked up here:
Clever Chicks Blog Hop
Better Mom Mondays Link-up
The Modest Mom Blog
Teach Me Tuesday - Homemaking Link Up
Creative At Home Wednesday
Raising Homemakers Homemaking Link-up
Encourage One Another Link-up
Weekend Whatever Link-Up
Time-Warp Wife
Far Above Rubies
Growing Home
Deep Roots at home: Encourage One Another Link-Up
Passionate and Creative Homemaking: Beautiful Thursdays Linkup


No comments:
Post a Comment
Share your thoughts! I'd love to hear from you!